
Fitting a straight piece of skirting board against a wall seems simple enough. Measure the length, make a cut, apply some adhesive, and you're nearly there.
Then you reach the first corner.
Suddenly, the two pieces don't quite meet. There's a small gap along the curved profile, the wall isn't as straight as you thought, and you're wondering whether a generous amount of filler might solve everything.
Sound familiar?
The good news is that fitting Torus skirting boards doesn't have to be difficult. Once you understand how to handle the corners, prepare your joints, and secure the boards properly, the rest becomes much more manageable.
This guide takes you through the process, including the little details that can make the difference between a rushed DIY job and a finish you're genuinely pleased with.
Before You Start: Get to Know Your Torus Profile
Torus is one of those skirting board designs you've probably seen countless times without knowing its name.
Its defining feature is the rounded moulding running along the upper section of the board. It's a familiar profile in British homes, and its gentle curve works well in both traditional and contemporary interiors.
That decorative shape is also why cutting the corners requires a little more attention than it would with a completely square-edged board.
If you're replacing existing skirting, check that your new boards have the same profile and dimensions. Two boards might both be described as Torus but have slightly different curves.
For example, the Torus MDF Skirting Board from Skirting4Less has a traditional rounded profile, with different heights, thicknesses, and priming options available.
There's also a Torus 1 MDF Skirting Board, which offers a variation on the classic design.
It's worth comparing these before ordering, particularly if you're trying to match existing woodwork.
Once you've selected your boards, it's time to think about fitting them.
What Tools Will You Need?
You don't need an entire carpenter's workshop, but having the right tools nearby will make the job considerably easier.
Here's what I'd recommend having ready:
-
Tape measure and pencil
-
Mitre saw or mitre box with a suitable fine-tooth saw
-
Coping saw for internal corners
-
Workbench or secure cutting surface
-
Fine-grit sandpaper
-
Suitable grab adhesive and applicator
-
Appropriate nails or screws if additional fixing is needed
-
Pipe and cable detector
-
Decorator's caulk and suitable filler
-
MDF primer or sealer and finishing paint
-
Safety glasses, dust protection, and gloves appropriate to the task
If you're working with MDF, keep in mind that cutting and sanding produce fine dust. Work in a suitably ventilated area, use extraction where possible, and wear appropriate respiratory protection.
One more thing: don't throw away your first few offcuts.
They're perfect for practising corner joints before making cuts on full-length boards.
Step 1: Measure the Room Before Cutting Anything

The temptation is to pick up your saw straight away.
Resist it for a moment.
Start by measuring each wall where the skirting will be fitted. Record the measurements and sketch a simple outline of the room, including doorways, internal corners, and external corners.
Why bother with a sketch?
Because not every piece needs the same cut.
A board that runs from a doorway to an internal corner will need a different arrangement from one that turns around an external wall.
Marking these details beforehand saves you from cutting the right length with the wrong end profile.
It's also worth ordering some additional material to account for offcuts, mistakes, and awkward corners. A modest allowance of around 10–15% can be useful, although rooms with complicated layouts may need more.
A useful tip: Measure each wall individually, even if two opposite walls appear identical. Older properties rarely have perfectly consistent dimensions.
If you're replacing old skirting, remove any remaining nails, loose plaster, or adhesive before starting.
Your new boards need a reasonably sound, clean surface to sit against.
Step 2: Start with a Straight Section
Before tackling the corners, get comfortable positioning a straight length of Torus skirting.
Hold the board against the wall with the decorative profile at the top.
Check how it sits against the plaster and flooring. If the wall bows slightly, you may notice small gaps behind the board.
Don't panic.
Minor irregularities can often be accommodated during fixing and finishing, although larger gaps may need additional preparation.
Make a square cut where required, then position the board without adhesive.
This is called a dry fit, and it's one of the most useful habits you can develop.
You get to see whether the measurement is correct before committing to the installation.
If the piece looks right, mark its position and move on to the next section.
You'll be glad you checked when you reach the corners.
Step 3: How to Cut Torus Skirting for Internal Corners

Here's where things become interesting.
An internal corner is where two walls meet inwardly, such as the corner of a bedroom or living room.
You might assume the easiest approach is to cut both pieces at 45 degrees and push them together.
Sometimes that appears to work, but there's a catch.
Many corners aren't exactly 90 degrees.
Even a small variation can leave a visible gap in the decorative Torus profile.
That's why a scribed joint is generally the preferred method.
How to make a scribed internal corner
Start by fitting the first skirting board with a square-cut end pushed into the corner.
The second board will be shaped to fit against the face of the first.
To create that shape, cut a 45-degree mitre on the end of the second board. This reveals the outline of the Torus profile along the cut.
Now use a coping saw to carefully remove the unwanted material behind that outline.
Angle the cut slightly backwards so the visible front edge fits neatly against the first board.
Don't worry if this takes a little practice.
The curved moulding requires patience, particularly if you're unfamiliar with a coping saw.
Once you've finished cutting, hold the two pieces together.
If they don't sit neatly, make small adjustments with the saw or fine sandpaper.
The goal isn't to force the boards together. It's to shape one so it naturally fits against the other.
Practise this on two short offcuts before working on a full-length section. It's much less frustrating to make a mistake on a small sample than on an entire board.
Step 4: Cutting Torus Skirting for External Corners

External corners are the opposite.
These are the corners that project outward into the room, such as around a chimney breast or a projecting section of wall.
For these, you'll normally use a mitre joint.
If the corner is exactly 90 degrees, each board needs a 45-degree cut in the opposite direction so the two pieces meet neatly.
The important word here is if.
Before cutting, check the actual corner angle rather than assuming the walls are perfectly square.
Then divide the measured angle between the two joining pieces.
For example, a true 90-degree corner requires two 45-degree cuts.
Once both ends are cut, bring them together and check the fit.
Look particularly closely at the upper Torus moulding.
Does the curve continue smoothly across the joint? Is one piece sitting slightly forward? Can you see daylight between the cut faces?
If something looks wrong, correct it before fixing the boards.
A small adjustment now is easier than trying to disguise a poorly fitted corner later.
When the joint fits correctly, use a suitable wood adhesive on the mating surfaces where recommended, then secure the boards.
Step 5: Joining Two Lengths Along a Straight Wall
What if your wall is longer than the skirting boards you've purchased?
You'll need to join two lengths together.
A simple square butt joint can work, but it may leave a more noticeable line once everything is painted.
A scarf joint is often a better choice for a long, visible run.
This involves cutting the adjoining ends at matching opposing angles so they overlap neatly rather than meeting as two blunt ends.
Before cutting, think about where the joint will sit.
If possible, avoid placing it directly in the most noticeable part of the room.
Check that both boards have exactly the same profile, height, and thickness.
Even a small difference can interrupt the rounded Torus detail.
Dry-fit the joint, apply suitable adhesive to the joining faces, and secure both lengths properly against the wall.
Don't rely on filler to make an uneven joint disappear.
The closer the boards fit before finishing, the better the finished result will look.

Step 6: Fixing the Torus Skirting Boards to the Wall
Once you're satisfied with the cuts, you're ready to secure the boards.
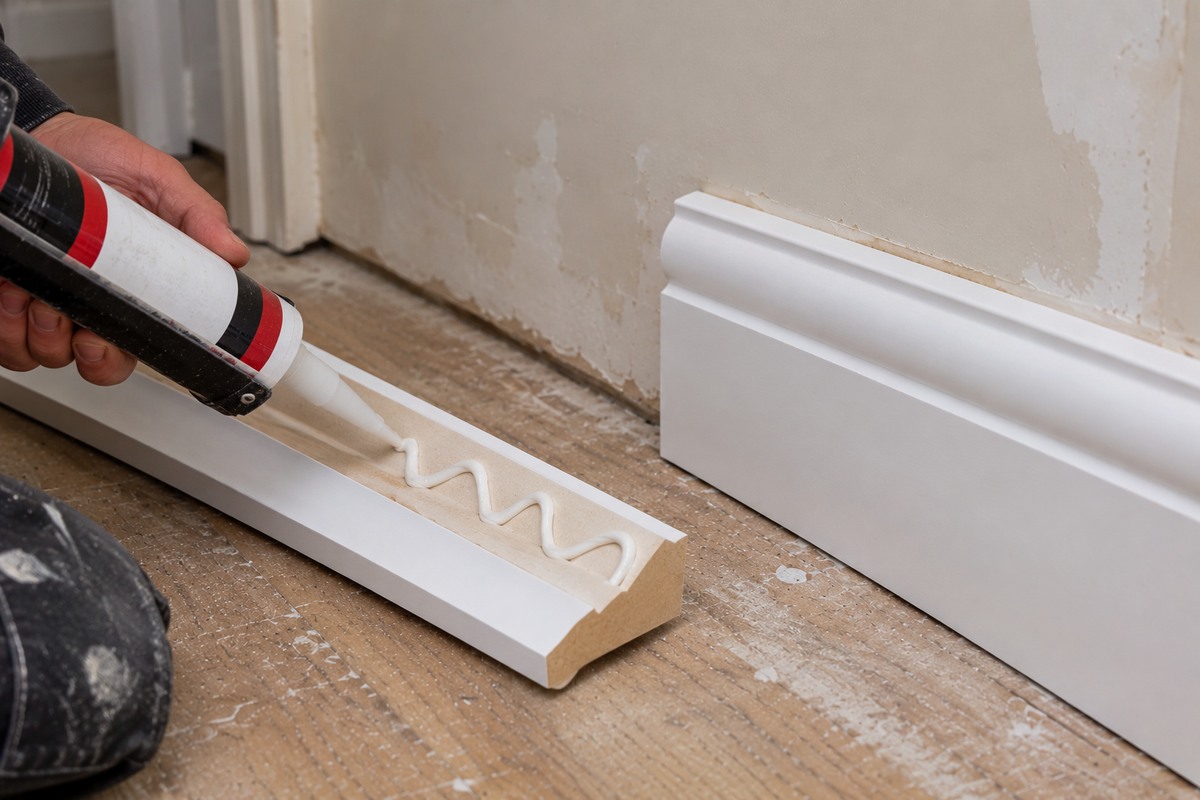
For many interior installations, a suitable grab adhesive can provide an effective fixing method.
Apply it to the back of the skirting according to the manufacturer's instructions, then press the board firmly into position.
Hold or temporarily support it as required while the adhesive develops its initial bond.
On reasonably flat, sound walls, adhesive may be sufficient.
However, uneven surfaces or longer sections may benefit from additional mechanical fixings.
For timber stud walls, nails or screws can be fixed into the studs. Masonry walls may require suitable plugs and screws.
Before drilling or nailing, check for hidden cables and pipes using an appropriate detector and safe working procedures. Never assume a section of wall is clear simply because nothing is visible on the surface.
As you work around the room, keep checking that the top of the skirting remains aligned and the joints haven't shifted.
Also, if you're fitting skirting around laminate or another floating floor, make sure the installation doesn't trap the flooring or interfere with its required expansion gap.
The skirting should be fixed to the wall, not through the floating floor.

Step 7: Fill, Caulk and Paint for a Clean Finish
You've measured, cut, joined, and fixed everything.
Now comes the part that can make even a fairly ordinary installation look impressive.
Start by inspecting your joints and fixing points.
Small nail holes, screw recesses, and minor surface imperfections can be filled with a suitable filler.
Once it's dry, sand the filled areas gently until they're smooth.
Next, look at the gap between the top of the skirting and the wall.
If there's a narrow, uneven line, flexible decorator's caulk can help create a tidy finish.
Apply a thin bead and smooth away the excess.
Avoid applying so much that it covers the decorative Torus curve.
Remember that caulk is intended for suitable finishing gaps, not for hiding badly cut corners or locking a floating floor in place.
Painting MDF Torus Skirting Boards

If you're using MDF, make sure any exposed cut ends are properly sealed before painting.
This matters because raw MDF edges can absorb paint differently from the smooth factory-machined surfaces.
Even if you've purchased pre-primed boards, newly cut ends and filled areas may still need additional preparation.
Once everything is ready, apply the appropriate undercoat and finishing paint according to the product instructions.
Take your time around the curved upper profile.
A lightly loaded brush is usually easier to control than one carrying too much paint, particularly where the moulding changes direction.
Allow the recommended drying time between coats.
The result should be a smooth, consistent finish that doesn't draw attention to the individual joints.
Three Mistakes Worth Avoiding
Even with careful planning, a few things can spoil an otherwise good installation.
1. Cutting every corner at 45 degrees
This is probably the easiest mistake to make. External corners are normally mitred, but internal corners generally benefit from scribing.
2. Skipping the dry fit
A board that looks correct on the workbench might sit differently against an uneven wall. Always test it before applying adhesive.
3. Leaving all the finishing work until the end
It's much easier to notice and correct an awkward joint while you're still working on that section. Inspect each fitted length before moving on.
None of these mistakes is particularly unusual. The important thing is catching them early.
Don't Overlook the Door Architraves
Once the skirting is fitted, take a look at where it meets your door frames.
The transition between skirting boards and architraves can have a surprisingly noticeable effect on the finished room.
If you're replacing both, a matching Torus Architrave can help carry the same rounded detailing around the doorway.
Check the relative thicknesses before installation, though. You don't want a skirting board projecting awkwardly beyond the architrave without a planned finishing detail.
If your existing architraves are staying in place, measure their dimensions before choosing new skirting.
It's a small consideration that can save unnecessary adjustments later.
Frequently Asked Questions
Can You Fit Torus Skirting Boards Yourself?
Yes. If you're comfortable measuring, cutting, and using basic woodworking tools, fitting MDF Torus skirting can be a manageable DIY project.
The most demanding part is usually creating neat corner joints, particularly scribed internal corners.
Should Torus Skirting Boards Be Glued or Nailed?
Suitable grab adhesive is commonly used, while nails or screws may be needed depending on the wall construction and how securely the board sits.
The best fixing method depends on the surface, board dimensions, and adhesive manufacturer's recommendations.
How Do You Cut Torus Skirting Without Damaging the Profile?
Use a sharp, suitable fine-tooth blade and secure the board properly before cutting. Support longer lengths and avoid rushing the cut.
For internal corners, a coping saw allows you to follow the curved profile more accurately.
Should You Paint Torus Skirting Before or After Fitting?
Both approaches can work. Painting or priming before installation may make some surfaces easier to reach, but joints, cut ends, and fixing points generally need attention after fitting.
Applying the final coat after installation often helps create a consistent appearance.
The Final Check Before You Put Your Tools Away
Stand back and look at the room.
Not just at the individual boards, but at how the skirting runs from one wall to the next.
Do the corners meet cleanly? Does the rounded profile continue neatly along the room? Are the joints discreet, and does the top edge follow the wall without distracting gaps?
These are the details that make the finished job feel complete.
You don't need to rush through an entire room in one afternoon. Taking a little longer to get the first couple of corners right can make the rest of the installation much easier.
And if you're still deciding which Torus profile or size to use, it's worth comparing samples before making your final choice.
After all, the goal isn't simply to get the boards onto the wall.
It's to fit them well enough that, once the room is decorated, you barely notice the work that went into them.