
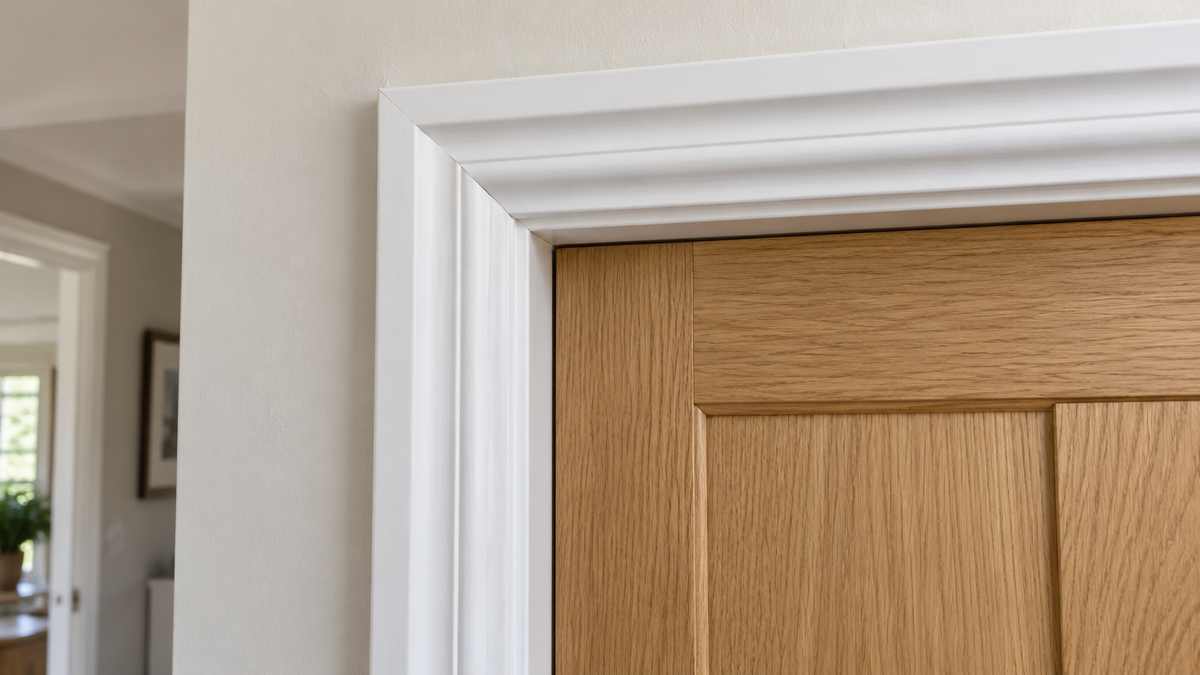
There's one part of fitting door architrave that can turn a perfectly good DIY afternoon into a frustrating one: getting those two top corners to meet neatly.
You measure carefully, cut what looks like a perfect 45-degree angle, and hold the pieces against the door frame. Then you notice it. A tiny gap where the decorative edges should meet.
It's tempting to reach for the filler straight away, but there's usually a better solution.
Fitting Ogee architrave isn't particularly complicated once you know how to approach the measurements, mitre cuts, and fixing process. The trick is understanding that a neat finish starts well before you pick up the saw.
Whether you're replacing worn-out door surrounds or finishing a newly renovated room, here's how to get it right.
Why Ogee Architrave Needs a Little Extra Attention
Ogee architrave has a distinctive curved profile that brings a traditional, decorative finish to internal doorways.
Unlike plain square-edged trim, its flowing curves create noticeable detailing around the door frame. That makes it an attractive choice, particularly in period properties and homes with traditional woodwork.
But it also means poorly fitted corners can stand out.
If the profiles don't meet correctly, the decorative curves won't flow neatly from the vertical pieces into the top section.
That's why accurate measuring and cutting are particularly important.
If you're choosing new trim, the Ogee MDF Architrave is available in different widths, thicknesses, and priming options, making it easier to select dimensions suited to your doorway.
There's also an Ogee 1 MDF Architrave, which offers a different variation of the profile.
Before ordering, check the dimensions and compare the profiles carefully, especially if you're matching existing woodwork.
Once you've chosen the right architrave, the fitting process can begin.

What You'll Need Before Starting
Gather everything before removing old trim or making your first cut. You'll need:
-
Tape measure, pencil, and combination square
-
Spirit level or straightedge
-
Mitre saw or mitre box with a fine-tooth saw
-
Suitable grab adhesive and wood glue
-
Hammer, nail punch, and appropriate fixing nails
-
Pipe and cable detector
-
Fine-grit sandpaper
-
Wood filler and decorator's caulk
-
MDF edge sealer or primer and finishing paint
-
Safety glasses and suitable dust protection
If you're cutting MDF, work in a well-ventilated area with suitable dust extraction and respiratory protection.
And keep a couple of short offcuts nearby. They're incredibly useful for testing your mitre angles before cutting the full lengths.
Start with the Door Frame, Not the Architrave
Before measuring anything, take a good look at the doorway.
Does the door lining sit flush with the surrounding wall? Are the corners reasonably square? Is there any damaged plaster or old adhesive left behind?
These details matter more than you might expect.
Architrave is designed to cover the joint between the wall and door lining, but it can't always disguise badly uneven surfaces.
If you're replacing old architrave, carefully remove the existing pieces and clean away loose filler, protruding nails, and remaining adhesive.
Check that the door lining is secure before fitting the new trim.
Now look at the space immediately around the door.
You don't normally fit architrave right against the innermost edge of the lining. Instead, you leave a narrow, consistent margin known as the reveal.
This small detail makes a surprisingly big difference to the finished doorway.
Step 1: Mark a Consistent Reveal Around the Door
A typical starting point is a reveal of approximately 5–6mm, although the exact amount should suit your door lining and hinge clearance.
Using a combination square or tape measure, mark your chosen distance from the inner edge of the door lining.
Make several small pencil marks along both vertical sides and across the top.
Then connect them using a straightedge.
You should now have three lines showing where the inside edge of the architrave will sit.
Why is this important?
Because trying to position each piece by eye almost guarantees slight inconsistencies.
One side might sit closer to the door opening than the other, making the finished frame look uneven.
The marked reveal provides a consistent reference throughout the installation.
Extend the pencil lines slightly beyond the top corners so you can clearly identify where the vertical and horizontal reference lines intersect.
Those intersections will guide your mitre cuts.
Before moving on, check that the chosen reveal leaves sufficient clearance for hinges and door movement.
Step 2: Measure and Cut the Top Architrave
The horizontal piece across the top of the doorway is called the headpiece.
It's a good place to start because it establishes where the two vertical pieces need to meet.
Measure the distance between the two upper intersection marks you made earlier.
Transfer that measurement to the inner edge of the headpiece, making sure there's enough material beyond each mark for the angled cuts.
Now comes the important part.
For a square doorway, the headpiece generally needs a 45-degree mitre at each end, with the cuts running in opposite directions.
The outer edge of the headpiece will therefore be longer than the inner edge.
If you're using a mitre box, position the architrave securely and make the cuts with a suitable fine-tooth saw.
A powered mitre saw can make the process quicker, but it isn't essential.
Don't rush to fix the headpiece just yet.
Hold it against your marked line and check how it sits.
Does it lie flat? Are the inner corners aligned with your pencil marks? Is the decorative Ogee profile facing the correct direction?
If everything looks right, set it aside while you prepare the vertical sections.
Step 3: Cut the Vertical Architraves
Now you need the two pieces that run down either side of the doorway.
Here's where measuring directly against the frame can save you from an awkward mistake.
Rather than assuming both sides are identical, measure each one separately.
Even in relatively modern homes, floor levels and door linings aren't always perfectly consistent.
Hold the first length against its reveal line with the bottom resting at its intended finished position.
Mark where the upper mitre needs to meet the headpiece.
Cut the top at the appropriate angle, ensuring it mirrors the corresponding cut on the horizontal piece.
The lower end will normally be cut square.
Repeat the process for the opposite side, remembering that the top mitre faces the other direction.
A useful habit is to mark the back of each piece with its position: left, right, or top.
It sounds almost too simple to mention, but when you're working with several similar-looking lengths, it's easy to pick up the wrong one.
And cutting the correct angle on the wrong end is a mistake most DIYers would rather avoid.
Step 4: Dry-Fit All Three Pieces Before Fixing
This is probably the most important stage of the entire job.
Position the headpiece and both vertical sections around the doorway without applying any adhesive.
Check the reveal lines first.
Then inspect the two upper corners.
The mitred edges should meet neatly, with the Ogee curves continuing naturally around the frame.
If you notice a gap, don't assume filler will solve it.
Look at what's causing the problem.
Is one piece slightly too long? Has the architrave shifted away from the reveal line? Is the doorway itself out of square?
Sometimes a small adjustment to the cut is all that's needed.
Other times, the wall surface may be preventing the architrave from sitting flat.
A neat mitre depends on both pieces being correctly positioned, not simply being cut at 45 degrees.
If the doorway isn't square, the mitre angles may need adjusting to suit the actual corner.
Take your time here.
Five extra minutes checking the fit can save considerably more time during filling, sanding, and painting.
Step 5: Fix the Ogee Architrave in Position
Once you're happy with the dry fit, you're ready to secure the pieces.
Start with the headpiece.
Apply a suitable grab adhesive to the back, following the manufacturer's instructions, then position it along the marked reveal.
Use appropriate fixing nails into the sound door lining where required to hold it securely.
Before using any mechanical fixings, check for hidden electrical cables and pipes. Pay particular attention around switches and other nearby fittings.
Next, prepare the first vertical piece.
Apply adhesive to the back and a suitable wood glue to the mating surfaces of the mitre joint, where recommended for the material.
Position it carefully against the headpiece, keeping the inner edge aligned with your pencil marks.
Press the joint together and secure the vertical section.
Repeat on the opposite side.
As you work, keep checking the upper corners. It's possible for a joint that looked perfect during dry-fitting to move slightly while the adhesive is being applied.
Wipe away excess glue before it dries, and avoid placing fixings too close to the ends, where they could damage the profile.
Once all three pieces are secure, allow the adhesives to cure according to their instructions.
Step 6: Finish the Joints Without Hiding the Ogee Detail
Now stand back and look at the doorway.
The three architrave sections should form a continuous frame, with the decorative profile flowing neatly around both top corners.
If you've fitted MDF architrave, there are a few finishing details worth paying attention to.
Start with the fixing holes.
Use a suitable filler to cover recessed nail heads and any minor surface imperfections.
Once the filler has dried, sand it gently until it's level with the surrounding surface.
Next, inspect the joints between the architrave and the wall.
Small gaps caused by uneven plaster can usually be finished with flexible decorator's caulk.
Apply a narrow bead and smooth it carefully, avoiding unnecessary build-up around the decorative edges.
For the mitred corners, use an appropriate filler only where minor imperfections remain. Large gaps are better corrected through fitting adjustments.
If the MDF is pre-primed, remember that newly cut ends may still need sealing.
Unsealed MDF edges can absorb paint unevenly, leaving a rough finish even when the front surfaces look smooth.
Apply the appropriate primer or edge sealer before your finishing coats.
When painting, use a brush suitable for detailed mouldings and avoid loading too much paint into the recessed curves.
You want to preserve the Ogee profile, not fill its detailing with thick layers of paint.
What If Your Door Frame Isn't Perfectly Square?
This deserves a little attention because older British properties rarely follow the neat angles we see in DIY diagrams.
You might find that the headpiece sits perfectly on one side but leaves a small gap on the other.
Or perhaps the architrave touches the wall at the top but stands slightly proud near the bottom.
Before making further cuts, identify whether the problem comes from the wall, door lining, or mitre angle.
If the corner isn't 90 degrees, adjust the mitre cuts to suit the measured angle instead of forcing standard 45-degree joints together.
If the wall is uneven, minor adjustments to the back of the architrave may help it sit more comfortably.
However, significant gaps or loose plaster should be addressed before fitting.
The goal isn't to force straight pieces against an unsuitable surface.
It's to prepare the doorway so the trim can be installed securely and neatly.
Make Sure Your Skirting Boards Work with the New Architrave
There's one final detail worth considering before calling the job complete.
Look at the bottom of the doorway, where the architrave meets the skirting board.
Ideally, the two should form a tidy, intentional junction.
If you're renovating an entire room, choosing complementary profiles can make this easier.
For example, pairing your new door trim with an Ogee MDF Skirting Board can help carry the same traditional styling around the room.
You could also consider an Ogee 1 MDF Skirting Board if its profile and proportions better suit the existing woodwork.
They don't have to be identical, but the decorative details should look comfortable together.
Check the thicknesses too.
If the skirting projects noticeably further than the architrave, the junction can look awkward unless you've planned a suitable finishing detail.
When replacing both skirting and architraves, fitting the architraves first generally makes it easier to cut the skirting neatly against the completed doorway.
Common Questions About Fitting Ogee Architrave
Can You Fit Ogee Architrave Yourself?
Yes. With accurate measurements, suitable tools, and some patience, fitting MDF Ogee architrave is a manageable DIY project.
The most important skills are marking a consistent reveal and cutting neat mitred corners.
Should You Glue or Nail MDF Architrave?
A combination of suitable grab adhesive and mechanical fixings is commonly used.
The appropriate method depends on the condition of the door lining, the dimensions of the architrave, and the fixing manufacturer's recommendations.
What Angle Should Ogee Architrave Be Cut At?
For a square doorway, the upper corners are normally formed using opposing 45-degree mitre cuts.
If the doorway is out of square, the angles may need adjusting to produce a close-fitting joint.
Can You Fit New Architrave Over Existing Trim?
Generally, new architrave is fitted after removing the old trim and preparing the underlying surface.
Fitting new material directly over existing architrave can create unnecessary thickness and awkward junctions around the doorway.
A Neat Doorway Comes Down to the Small Details
Once the architrave is painted and the room is decorated, most people won't notice how carefully you measured the reveal or how many times you checked the mitred corners.
They'll simply see a neatly finished doorway.
And that's exactly what you're aiming for.
Take your time marking the door lining, check every cut before applying adhesive, and don't rely on filler to compensate for poorly fitting joints.
Ogee architrave is particularly attractive when its decorative curves run smoothly around the frame, so those extra few minutes spent on the top corners are worth it.
Get the measurements right, make careful cuts, and let the finishing work bring everything together.